New User Guide
The Process Pilot Ai application helps organizations to create, manage
and execute multiple processes at a single collaborative platform.
Below are the steps that define how you can use the Process Manager.
Create process in the application
-
We first navigate to the Process Pilot Ai Admin dashboard.
-
From the dashboard, the “Admin” can login with the pre-defined
credentials provided.
-
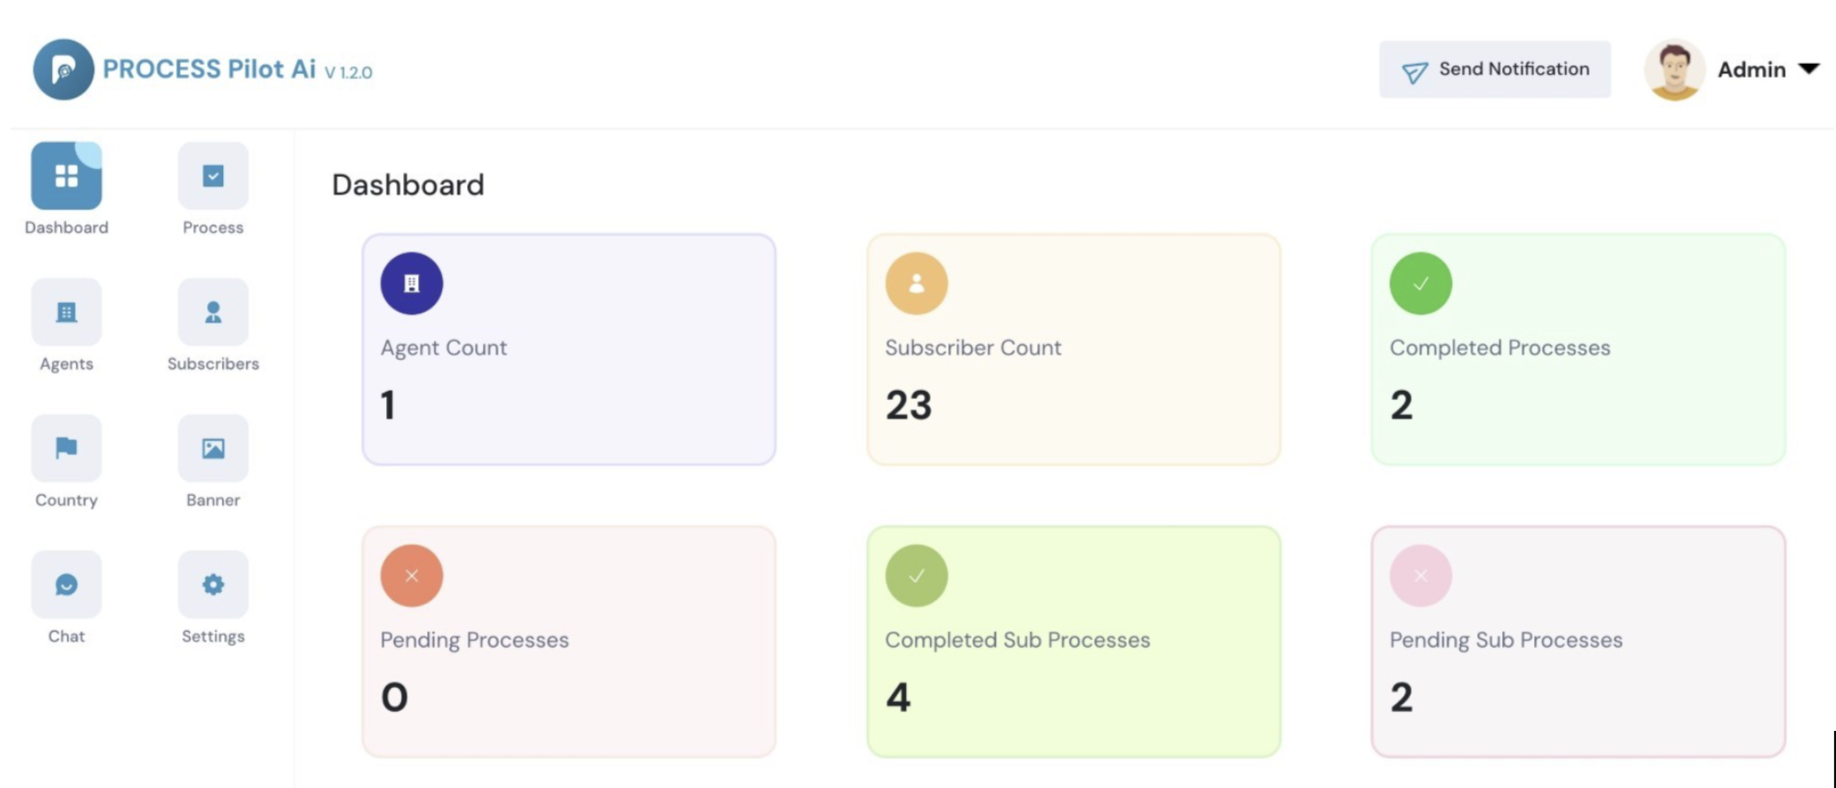
We are then navigated to the “Process Pilot Ai” dashboard, on the
left-hand side where we can find all the menus for all unique events
of the process.
-
The dashboard displays
“Agent Count”, “Subscriber Count”, "Pending Process", “Completed
Process”, “Pending Sub-process” and “Completed Sub-process”.
-
Firstly, we configure the country code, from a drop-down list we can
choose the country and switch the Toggle switch to ON.
-
Next, we navigate to the “Process” tab, where we can add the
process, as different individual services.
-
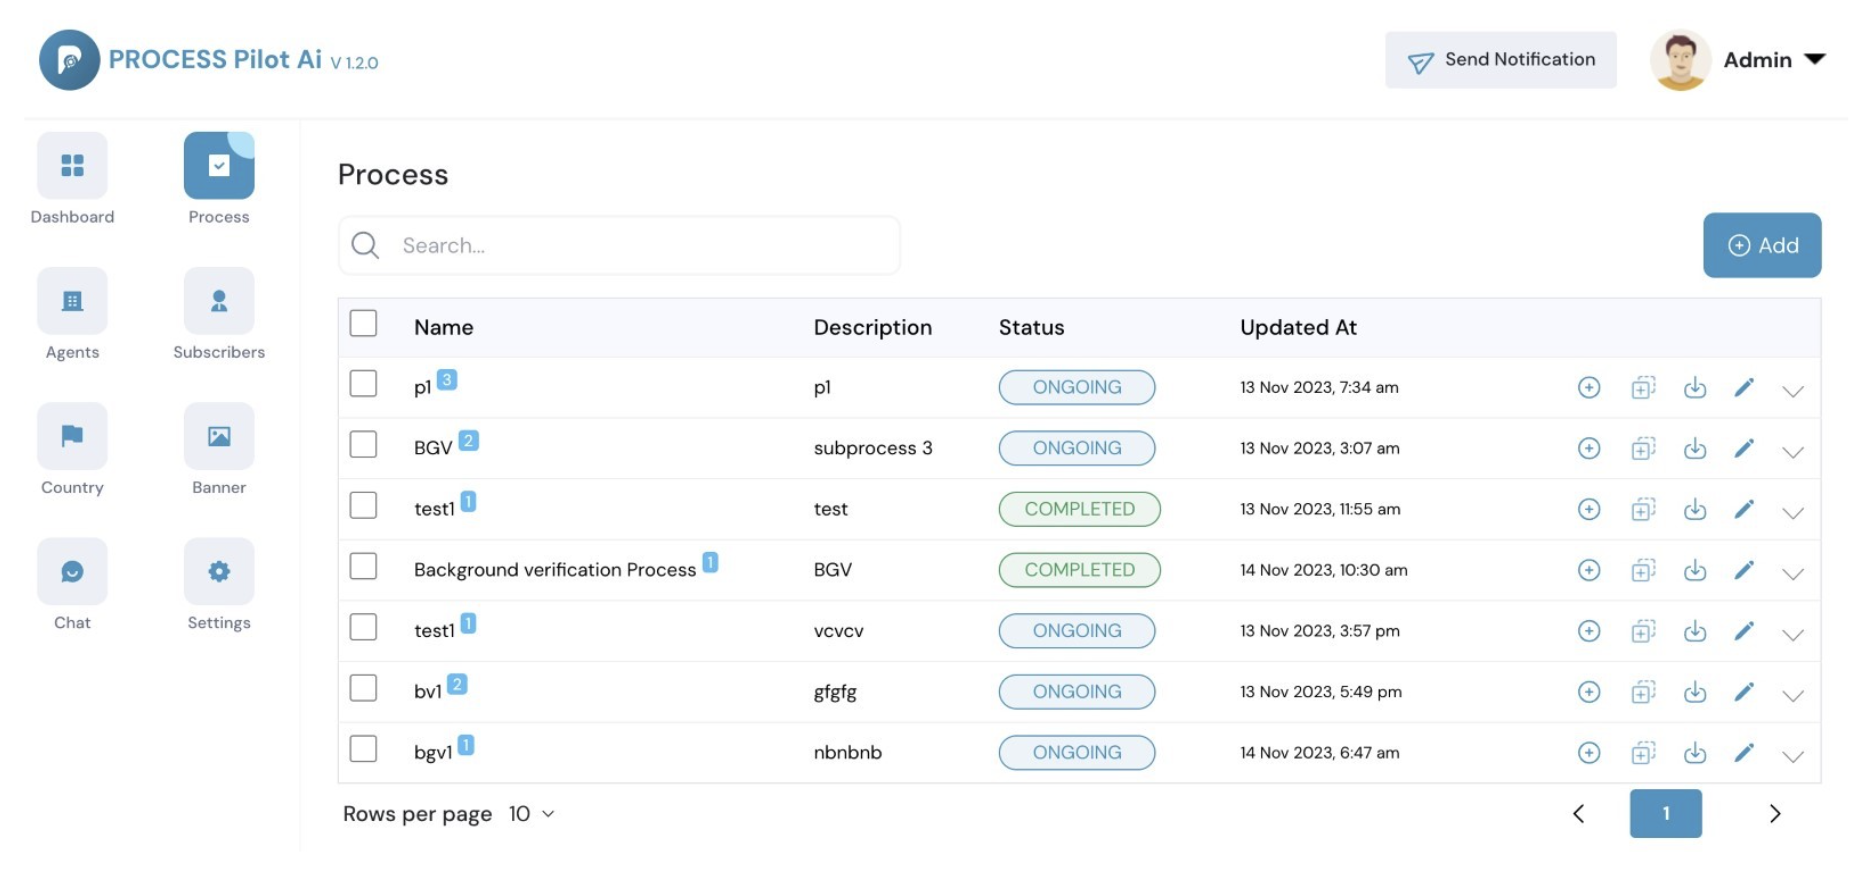
From the Process Dashboard, we have the functionalities to
“Clone” the Process, “Download” the report,
“Edit” the process, and Add a “Sub-process”
-
We can take an example of Background Verification to
demonstrate the flow.
-
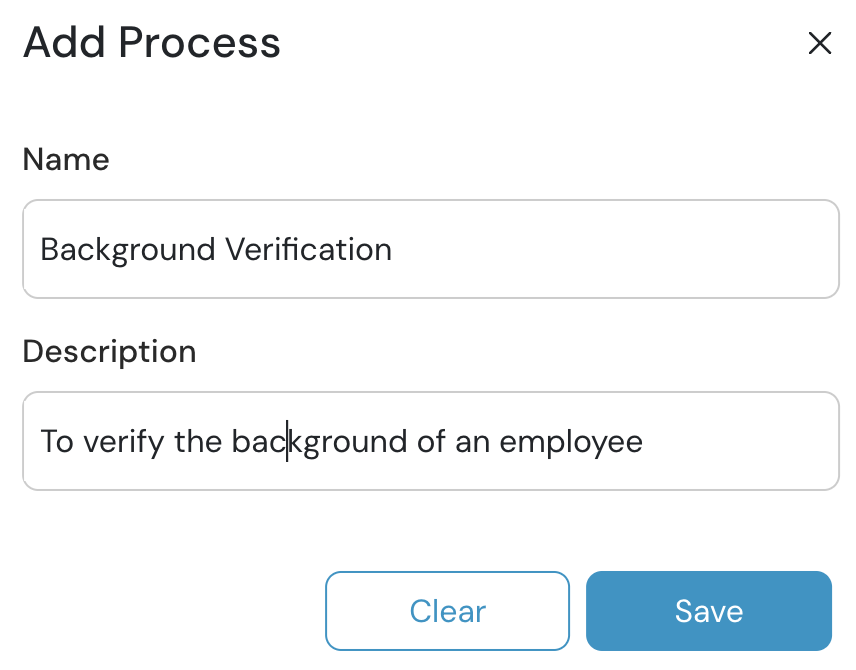
Next, we create a process named “BGV” for the verification of
background and add a description about the process I.e. To verify
the background of a newly joined employee, click Save.
-
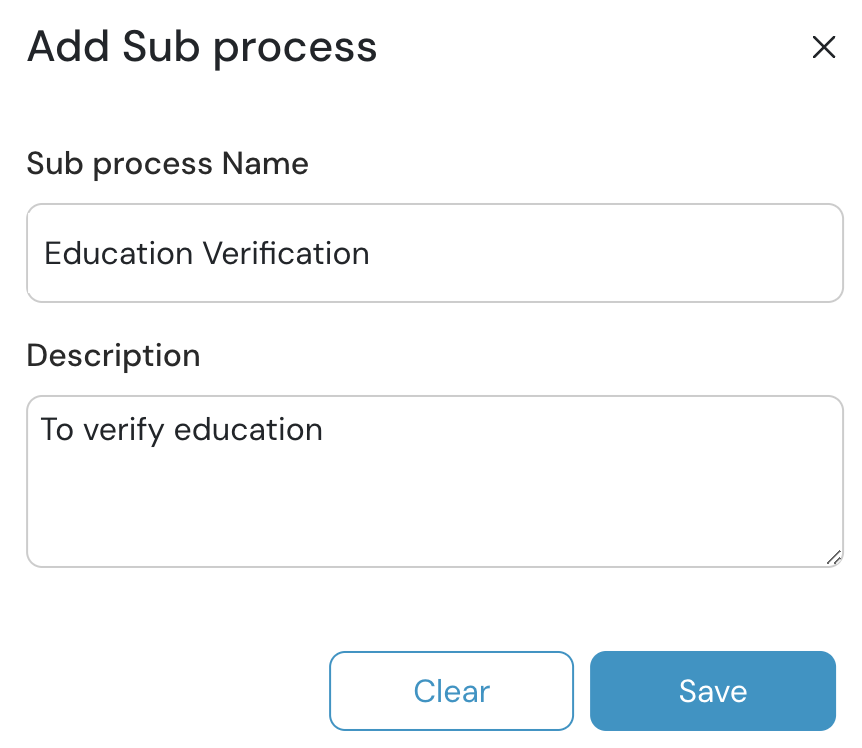
Next, click on the “Plus” button, where we can add a sub-process.
-
We create a “Sub-Process”, for “Educational Check”, and add a
description about the sub-process, and click Save.
-
Next, navigate to the Task page by clicking on the
Sub-Process name.
-
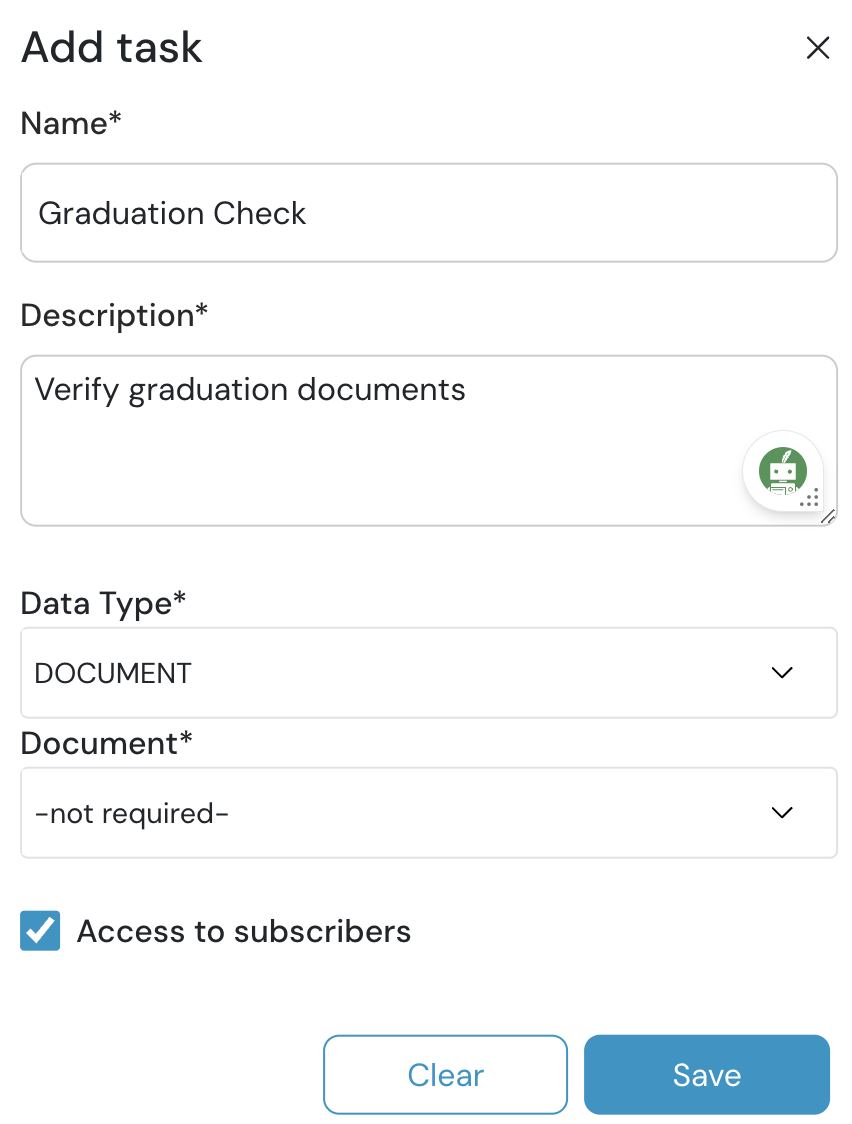
Then, we create a “Task” for the Sub-Process by clicking on
the Add button. For background verification, the task for the Agent
would be verifying Degree Certificate and 12th Grade Certificate.
-
Firstly, add Task name, A description and select the
Data Type from the drop-down in case of document verification, we
would choose “DOCUMENT”, and click Save.
-
We can then provide “Access to Subscriber”, thus it would reflect in
the Subscriber Dashboard.
-
Click on the “Submit” button to confirm the process, once it
has been submitted it cannot be edited or changed.
-
For each Task, we now assign an Agent (Which can be created
from the Agent Tab) and one or many Subscribers (Created from
the Subscriber Tab).
-
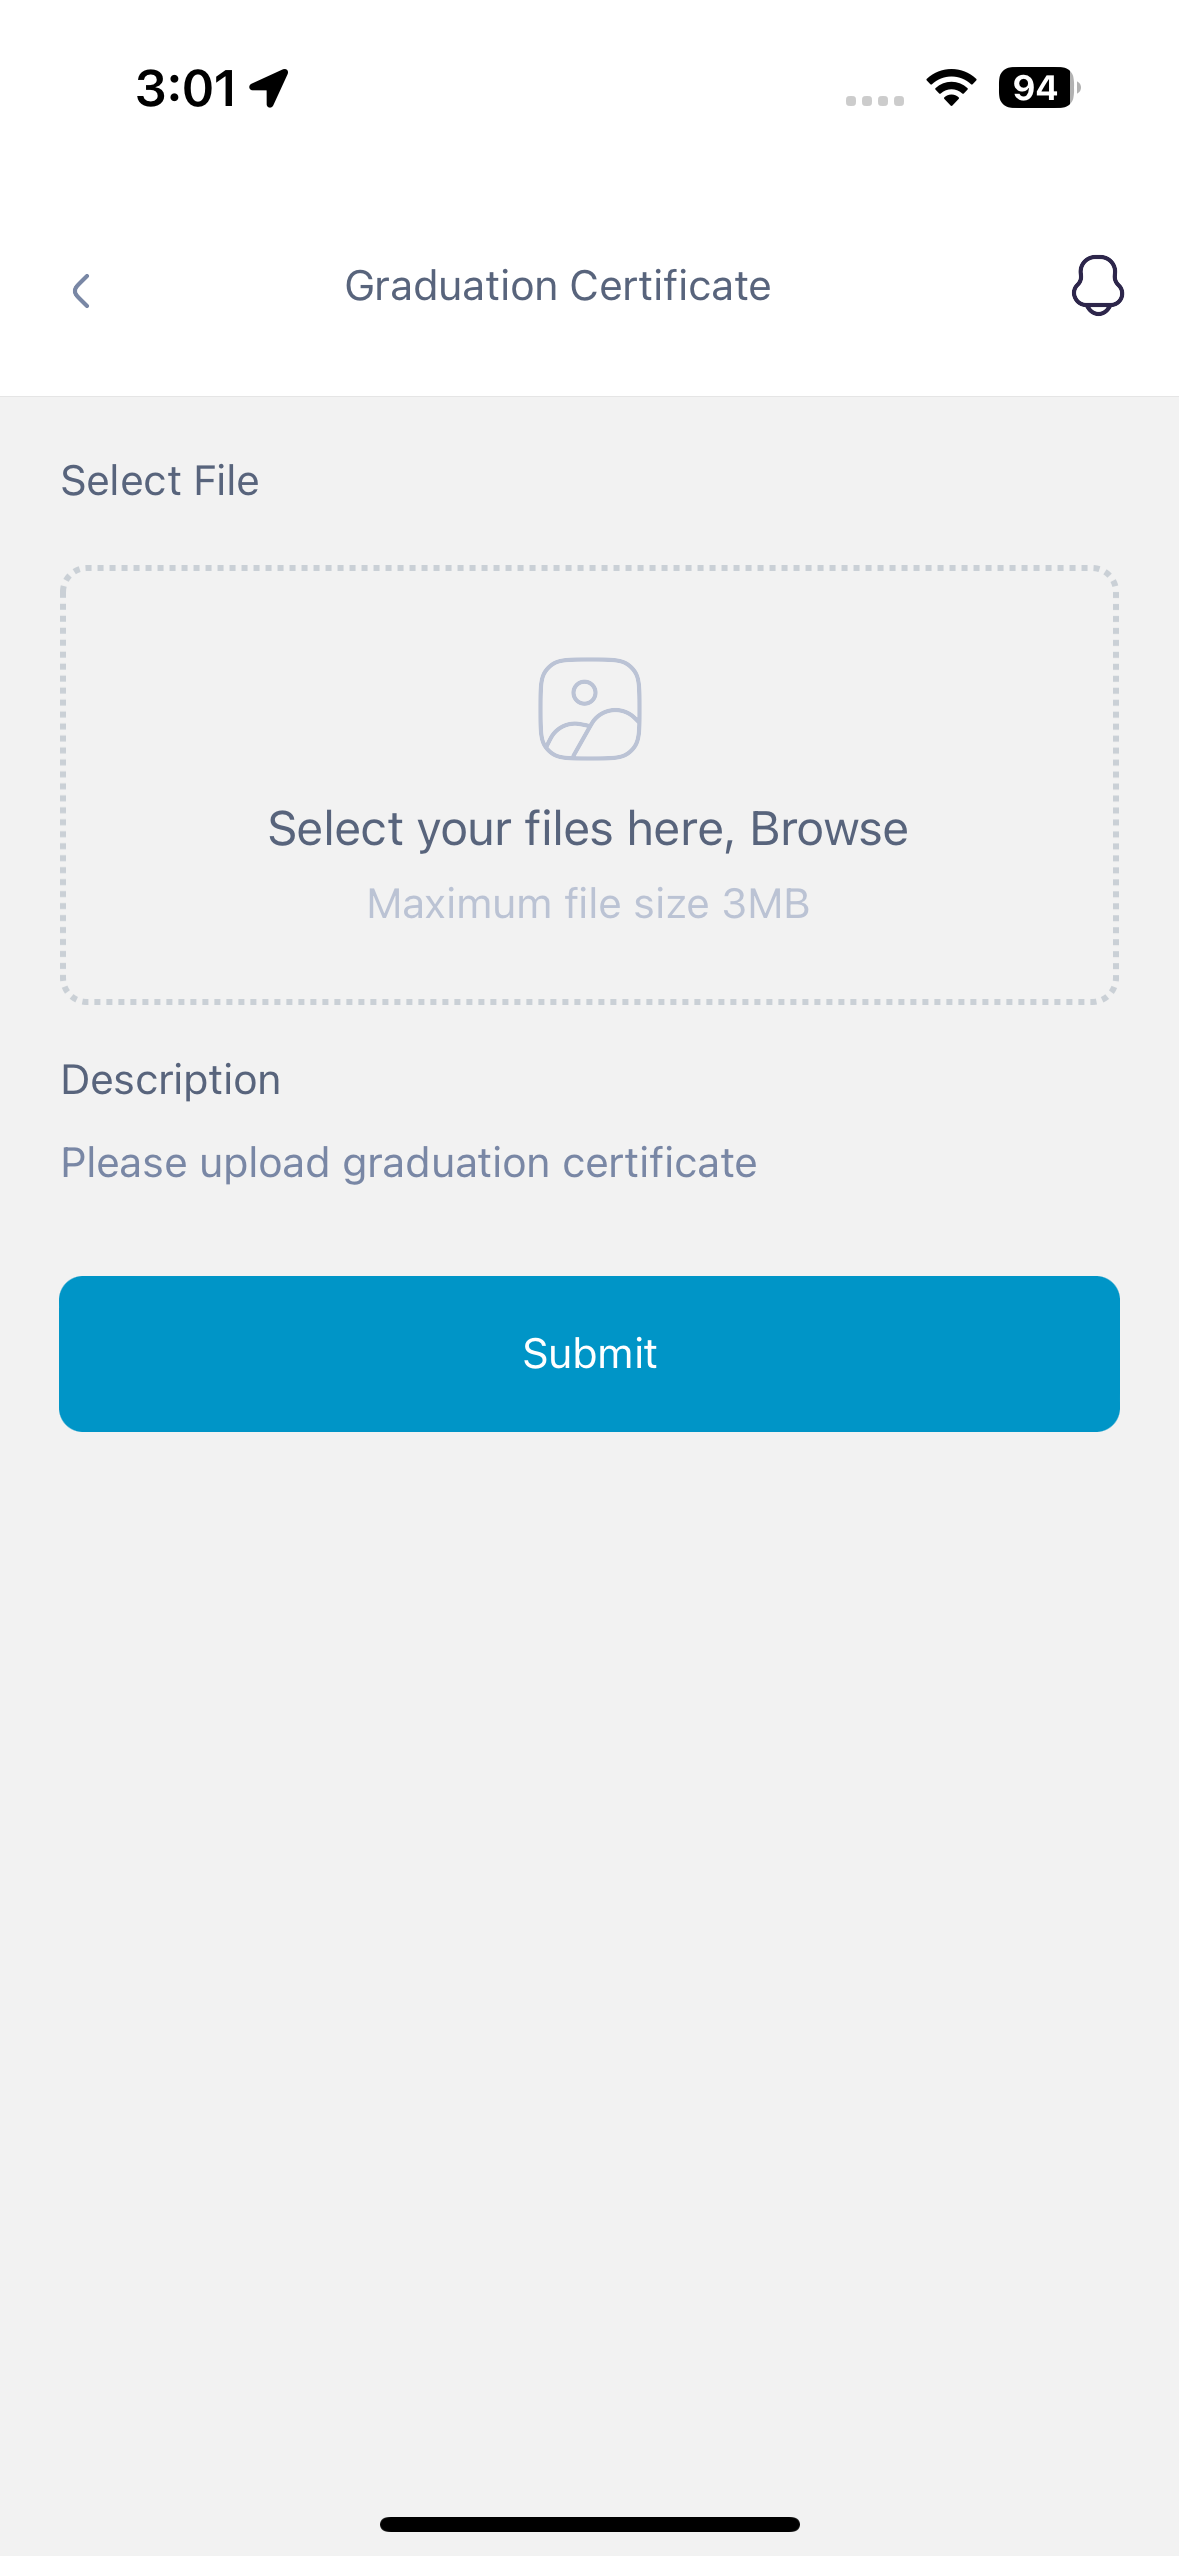
The Subscriber then needs to download the mobile application
from the app store or play store and upload the requested documents
from the mobile application.
Admin Login Dashboard
Process Dashboard
Create Agents
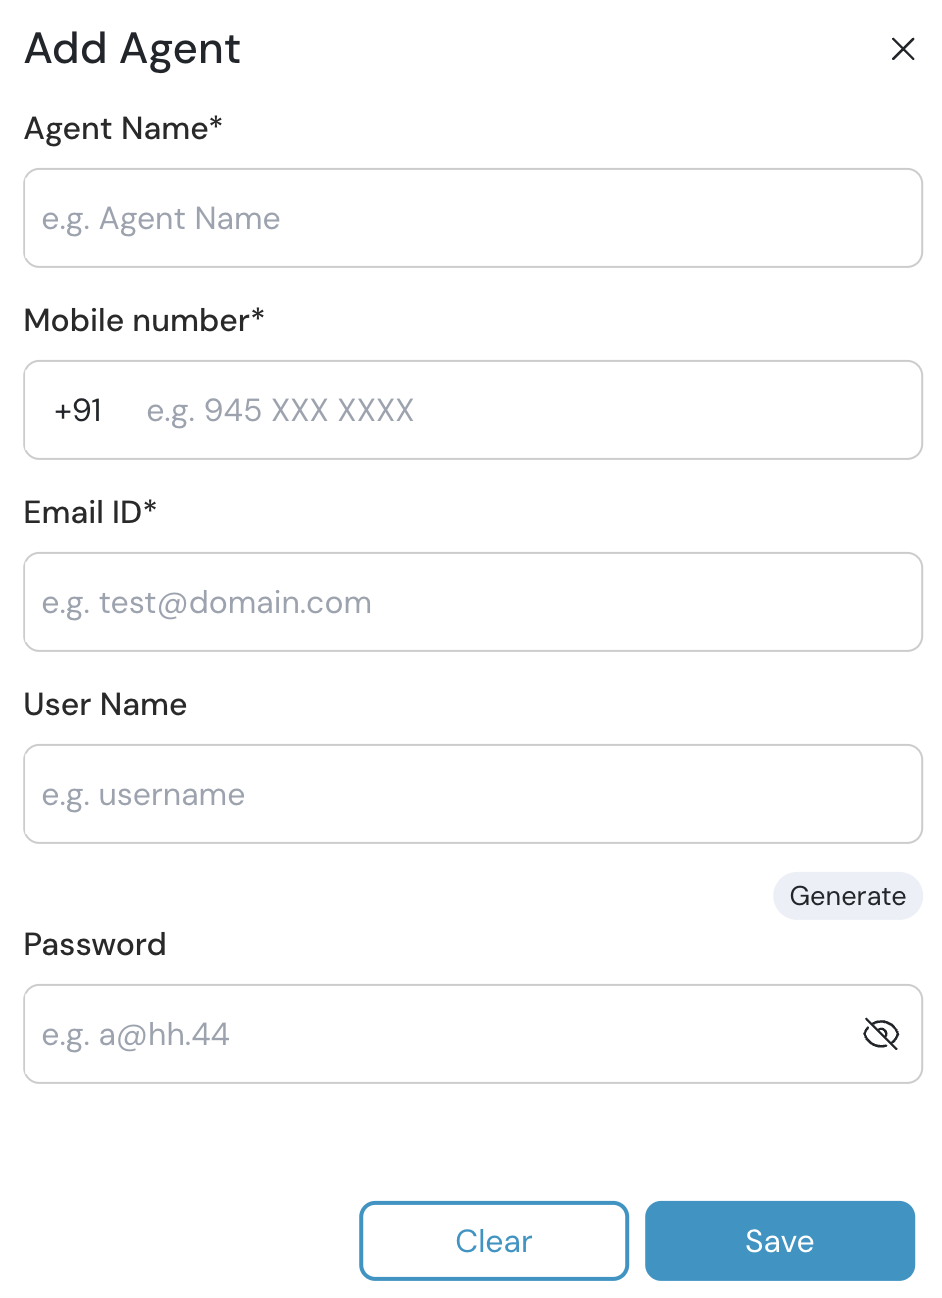
- From the Admin Panel, click on the Agents Tab.
- Click on Add Agents.
-
Add Agent name, Mobile Number, Email ID, username and password.
- We can add multiple Agents similarly.
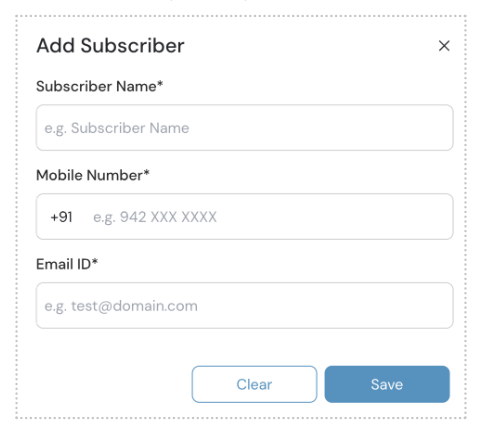
Create Subscriber
- From the Admin Panel, click on the Subscribers Tab.
- Click on Add Subscriber.
-
Add Subscriber name, Mobile Number and Email ID, and add multiple
subscribers similarly.
-
We can also add Subscriber, using a CSV format. Just download the
CSV template, add the Subscriber details (Name, Email ID, Mobile
Number) and upload it.
Assign Task to Agents and Subscriber
- Navigate to the Process Tab.
-
Select the Process checkboxes you want to assign, click submit.
-
Now choose the designated Agent and Subscriber for the following
task and click Save.
-
The status of the Task now changes from “Pending” to “Ongoing”.
Agent Web Login
-
The Agent can now login from the credentials provided by the Admin.
-
Here, the Agent can view the tasks assigned to him and the documents
uploaded or pending from the Subscriber as well.
-
The Agent can verify the document uploaded, for example, if the
document is “Graduation Certificate”, he can download the document
and verify it.
-
If the document uploaded is not right, The Agent can re-assign the
Task to the Subscriber to re-upload it.
-
If the document uploaded is right, The Agent can then change the
status of that Task to “Completed”.
-
The “Completed”, “On-going”, and “Pending" Tasks can be then viewed
from the dashboard.
Agent Mobile Login
-
The Agent can now login from the credentials provided by the Admin.
-
Here, the Agent can view the tasks assigned to him and the documents
uploaded or pending from the Subscriber as well.
-
The Agent can verify the document uploaded, for example, if the
document is “Graduation Certificate”, he can download the document
and verify it.
-
If the document uploaded is not right, The Agent can re-assign the
Task to the Subscriber to re-upload it.
-
If the document uploaded is right, The Agent can then change the
status of that Task to “Completed”.
-
The “Completed”, “On-going”, and “Pending" Tasks can be then viewed
from the dashboard.
Subscriber Login
-
The Subscriber can login to the Mobile Application by providing his
credentials.
-
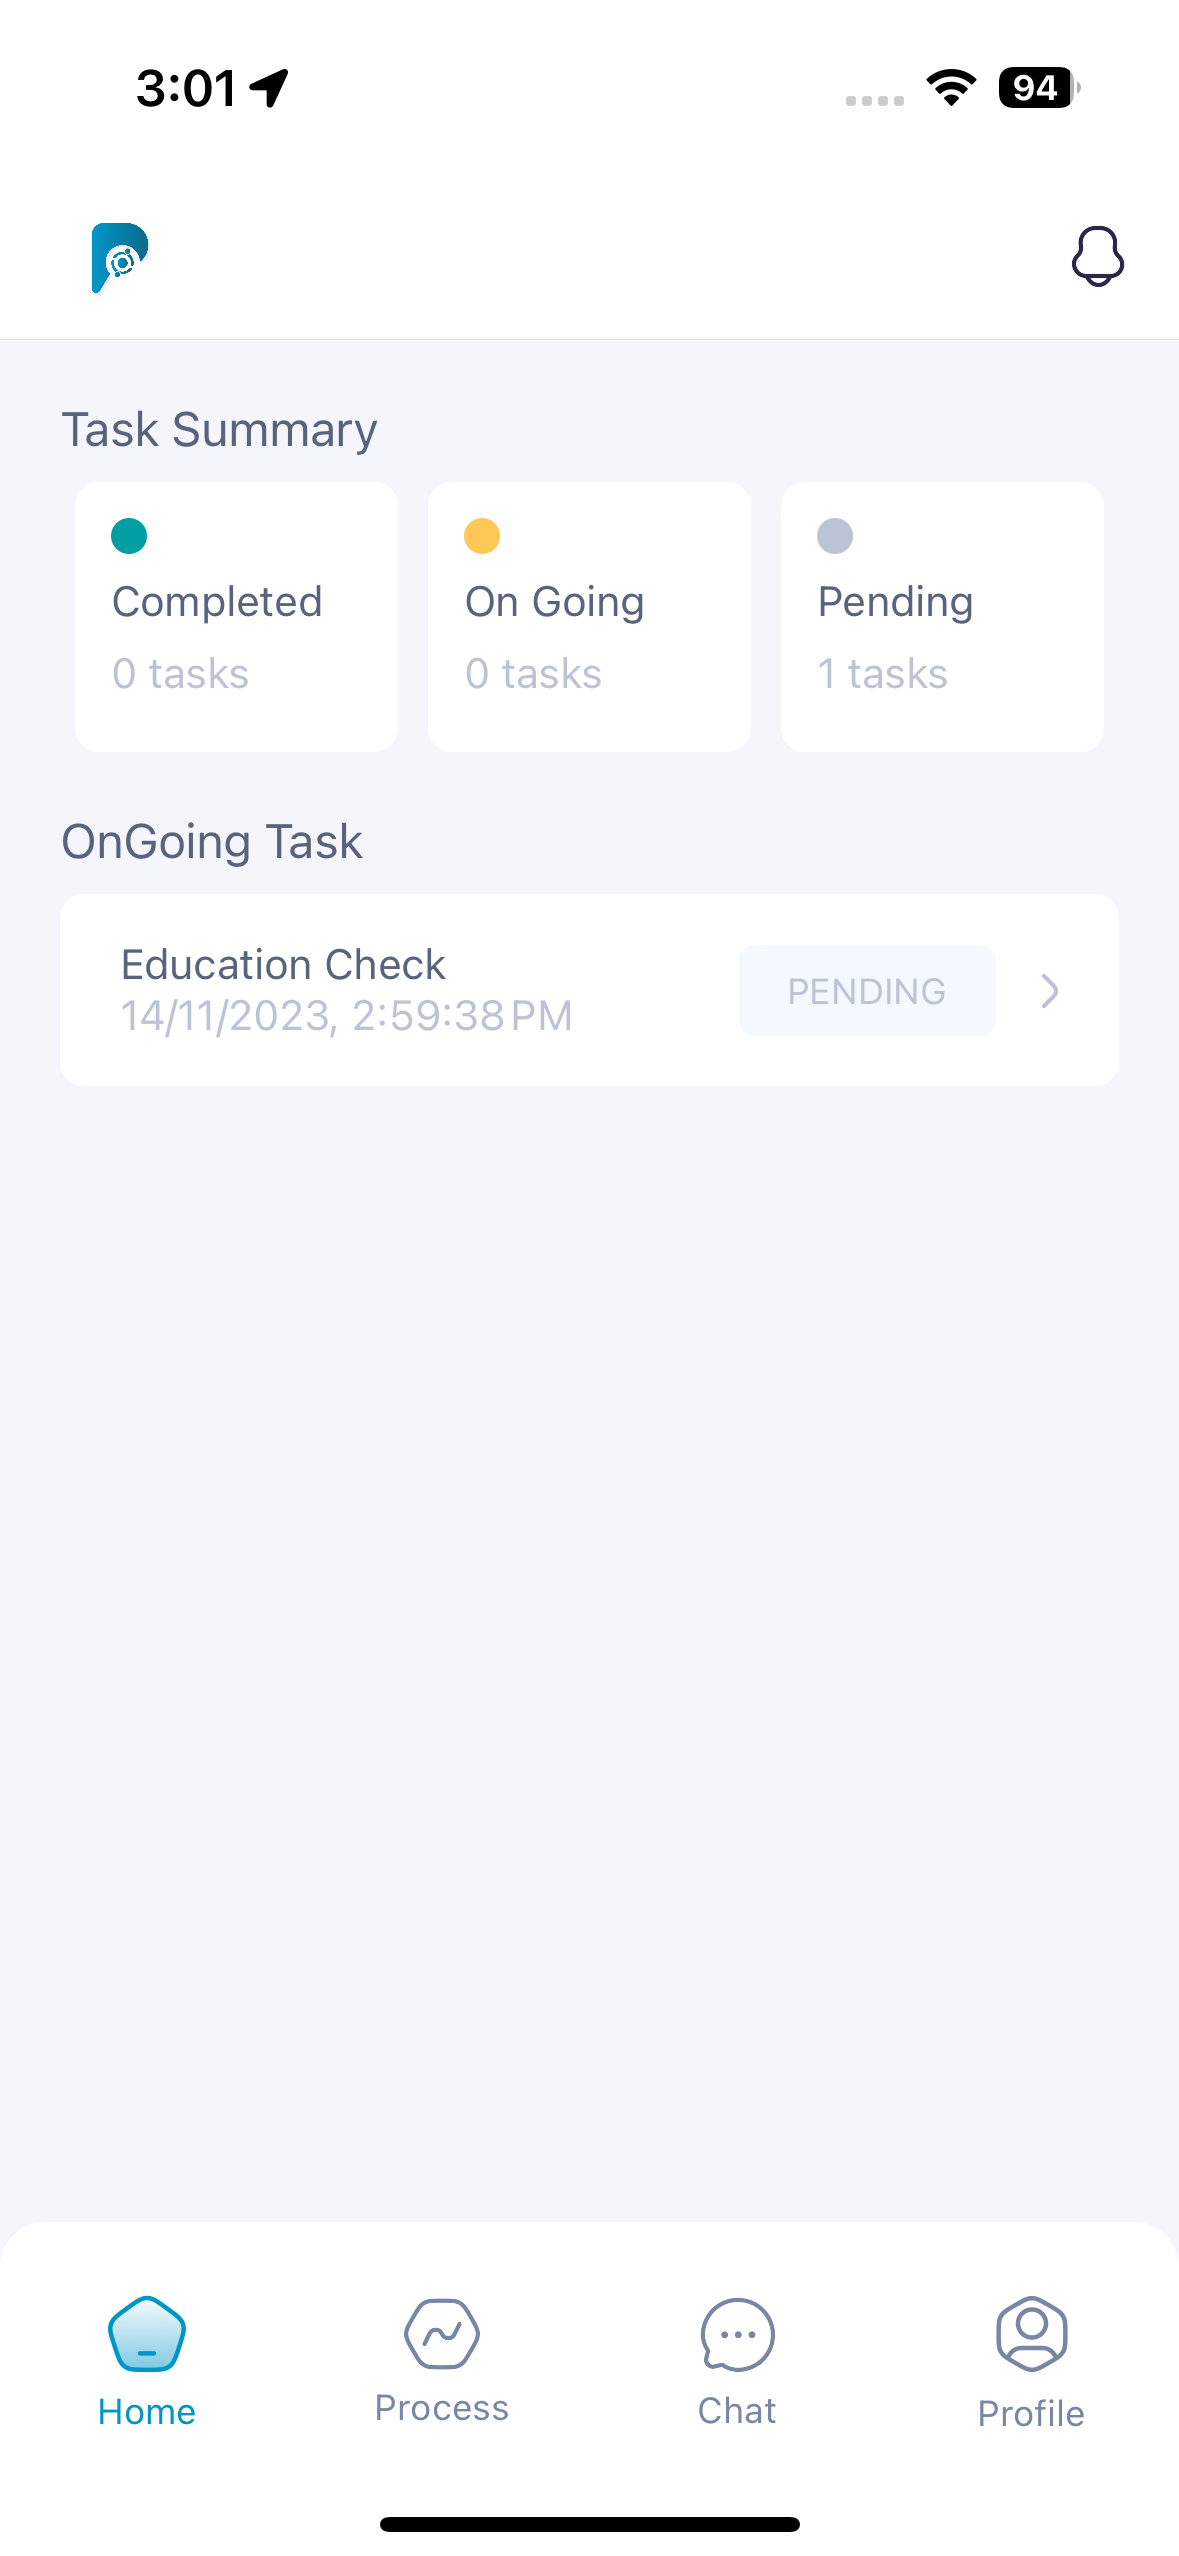
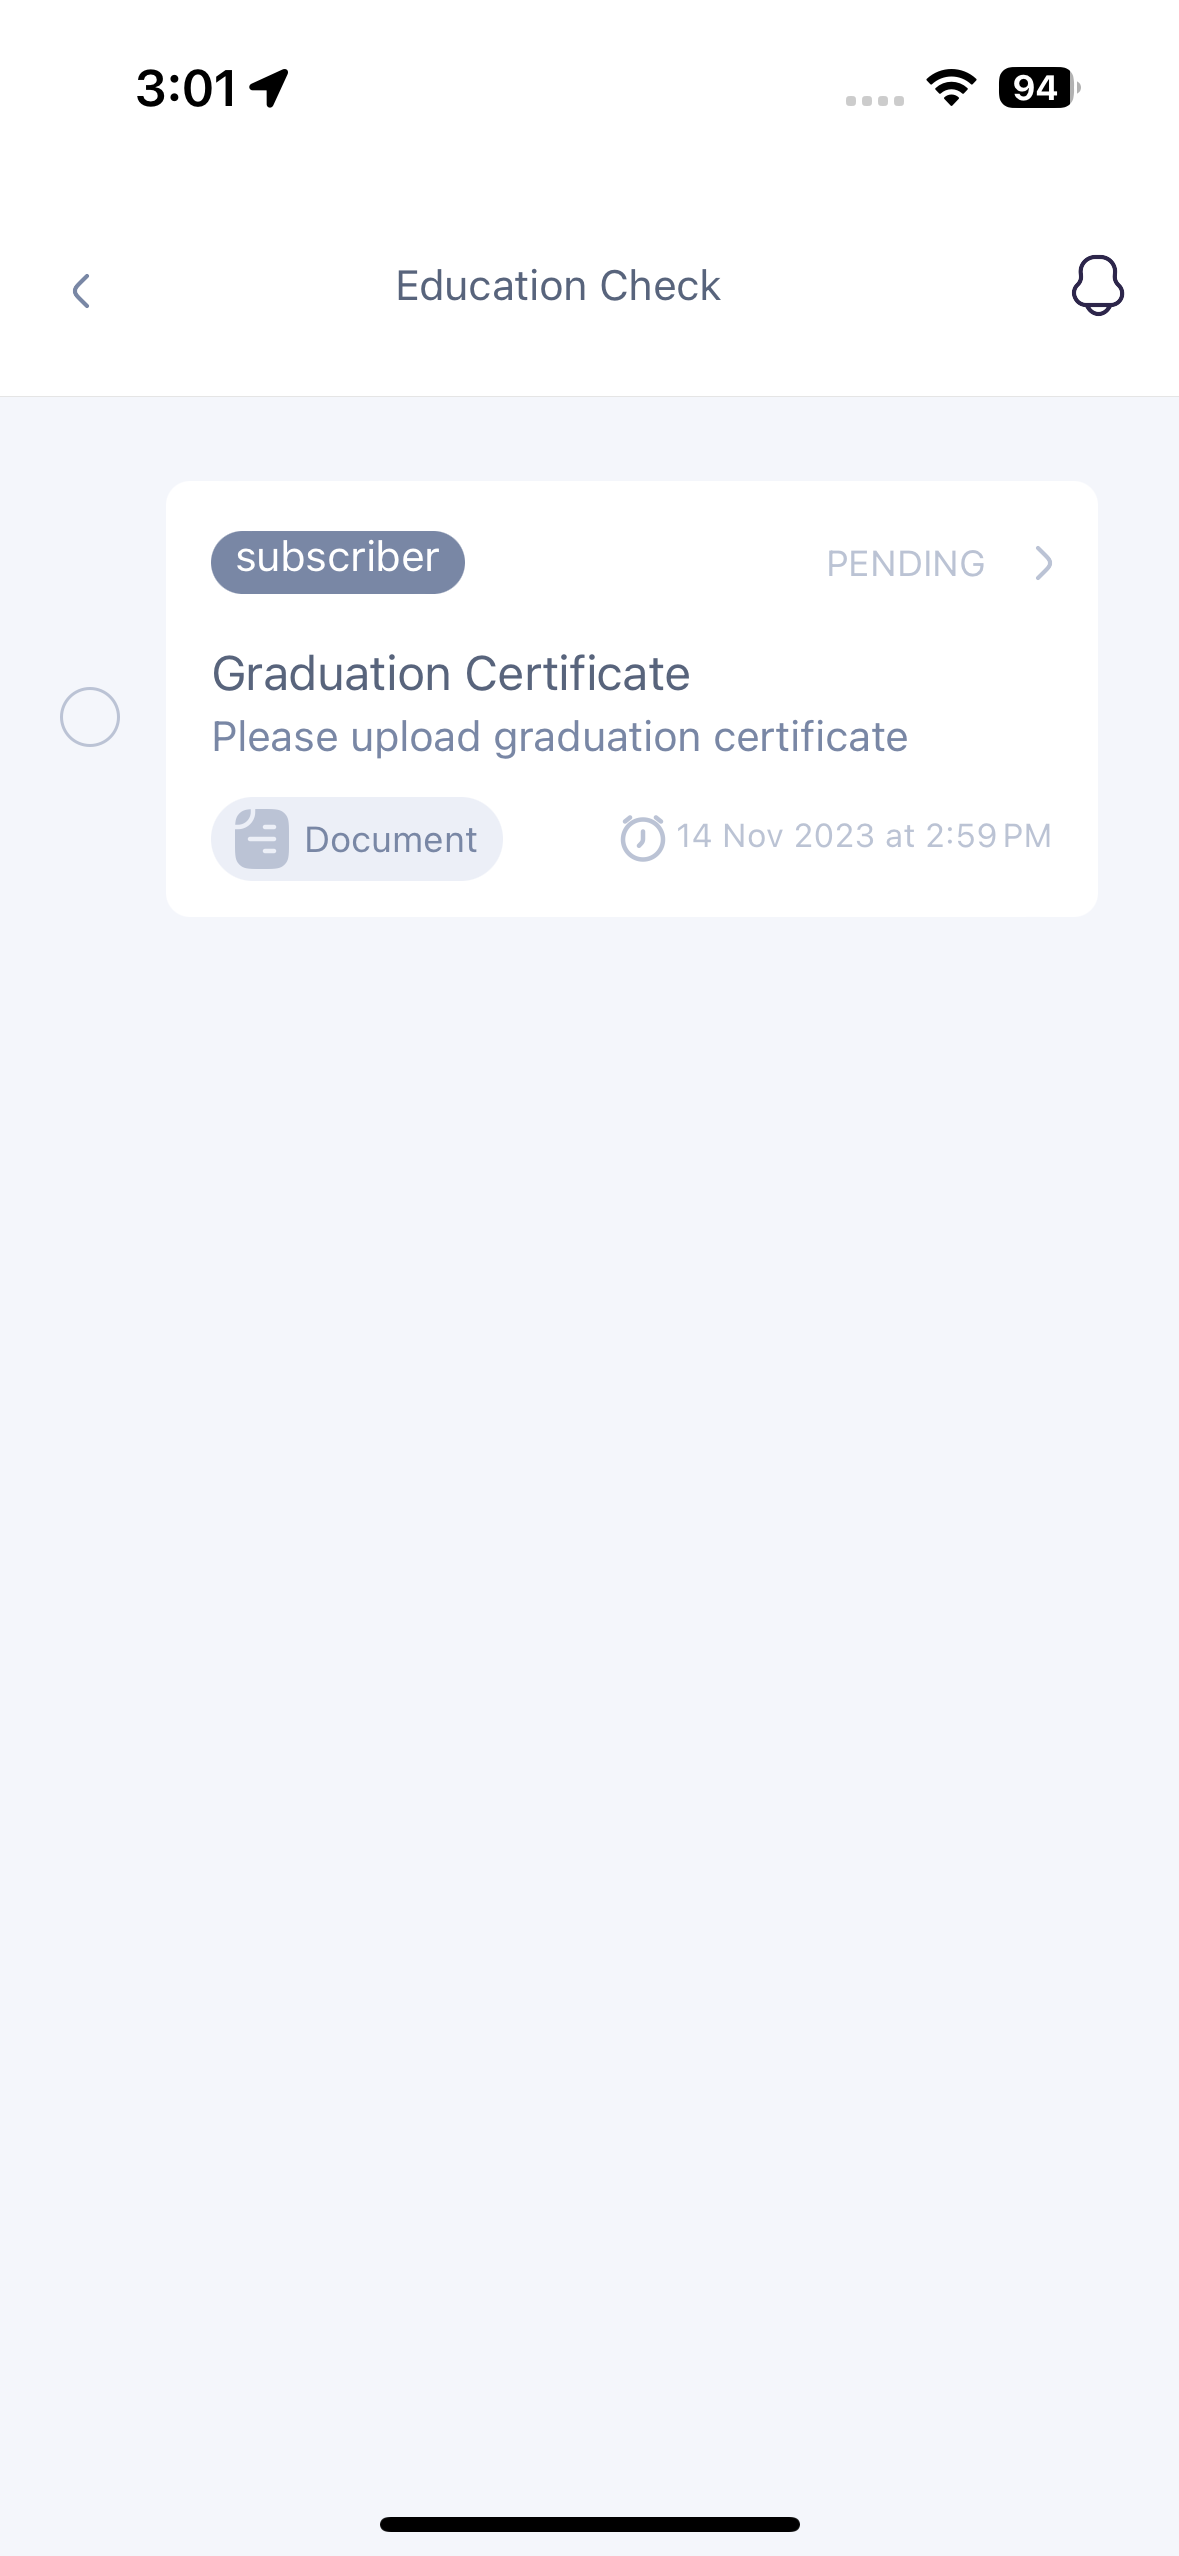
Here, the Subscriber can view tasks pending or documents to be
uploaded.
-
The Subscriber can view “Completed”, “On-going”, and “Pending” tasks
from the dashboard.
Installation and Set-up instructions
The Process Pilot Ai application does not require any special system
setup and configuration. The application is indeed very simple to use,
for any non-technical user as well.
IOS Application
To download the iOS application, follow the steps below:
- On your iPhone or iPad, open the App Store app.
-
Search for “Process Pilot Ai”, Click on “Install”. The download will
begin.
-
Once you have the app downloaded, you can sign up using your email
id or phone number to register into the application.
Android Application
To download the Android application, follow the steps below:
- On your device, Open the Play Store app.
-
Search for “Process Pilot Ai”, Click on “Install”. The download will
begin.
-
Once you have the app downloaded, you can sign up using your email
id or phone number to register into the application.
Web Application
To access the Web application, follow the steps below:
To access the application on the web, click on the link below, which
will navigate you to the Process Pilot Ai Admin dashboard.
https://processmanager.freston.io/auth/login


